Overview
Import your Shopify store products and collections to ManyChat.
Select products you want to shop in your flow.
Filter your collections with tags and product types.
Getting Started
Step 1
After completing your subscription purchase, locate the ShopSync license key in the Thank You email we have sent to your email address. If you did not receive an email after purchase, please contact our support team at support@letmetalk.ai.
Keep this license key on hand as you will need it in the next steps.
You will also find in this email your customer ID. DO NOT SHARE THIS WITH ANYONE.
Step 2
Creating a Shopify App.
Generate Credentials From The Shopify Admin.
After you enable private app development from the Shopify admin, you need to generate the required credentials from the Shopify admin of the store that you want to connect with your app.
Steps :
- From your Shopify admin, go to Apps.
- Click Develop apps.
- Click Create an app.
- In the Create an app pop-up, enter a name for your app and a contact email address.
*Shopify uses the email address to contact the developer if there is an issue with the app, such as when an API change might break it. - Click Configure Admin API scopes
- Check Read access to Inventory, Products listings and Products. All 3 are required in order for the app to work.
- You can now save the Admin Api access scopes.
- We do not need access to your StoreFront API so you can leave that as it is.
- Back in the overview, click Install app
The API key and password for your app are now displayed on screen.
Reveal your Admin API access token and keep it on hand. We will need it in the next steps. You may also want to save it somewhere safe.
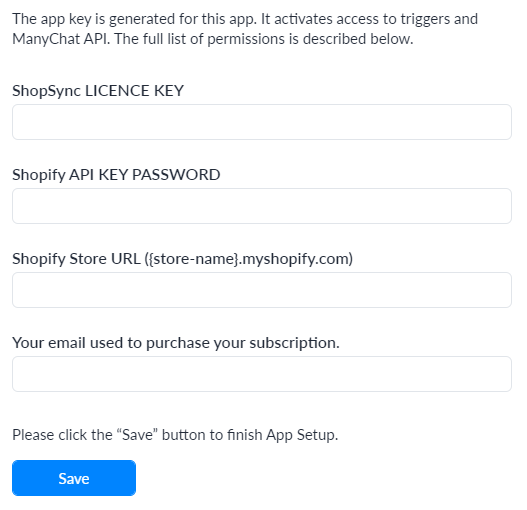
App Setup
Step 3
Locate your myshopify.com domain and keep it on hand. You can find your domain in your address bar when you are logged in your Shopify Admin Dashboard. It looks something like [your_store_name].myshopify.com.
Step 4
After installing ShopSync in ManyChat, you will find the App Setup form.
Using the information collected above, fill in the input fields with their associated value.
Enter the email used to purchase ShopSync
Click Save.
The app configuration is now complete! However, please read carefully the next steps on how to use the app and the app’s templates.
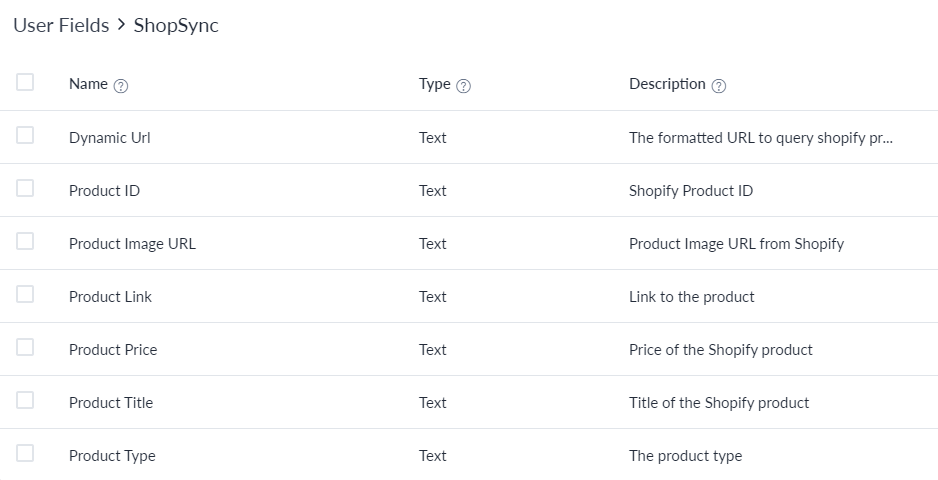
Creating Variables
Let’s create a folder to hold the data that’s going to be generated by the app.
- In ManyChat, go to Settings >Fields.
- Click Create Folder and name it ShopSync
- Move the User Fields listed below to your new folder.
Head to Bot Fields at the top and change the value :
- shopify_store_name: Write your Shopify Store name.
You are now ready to start building your flows!
How To Use The App
Single Product
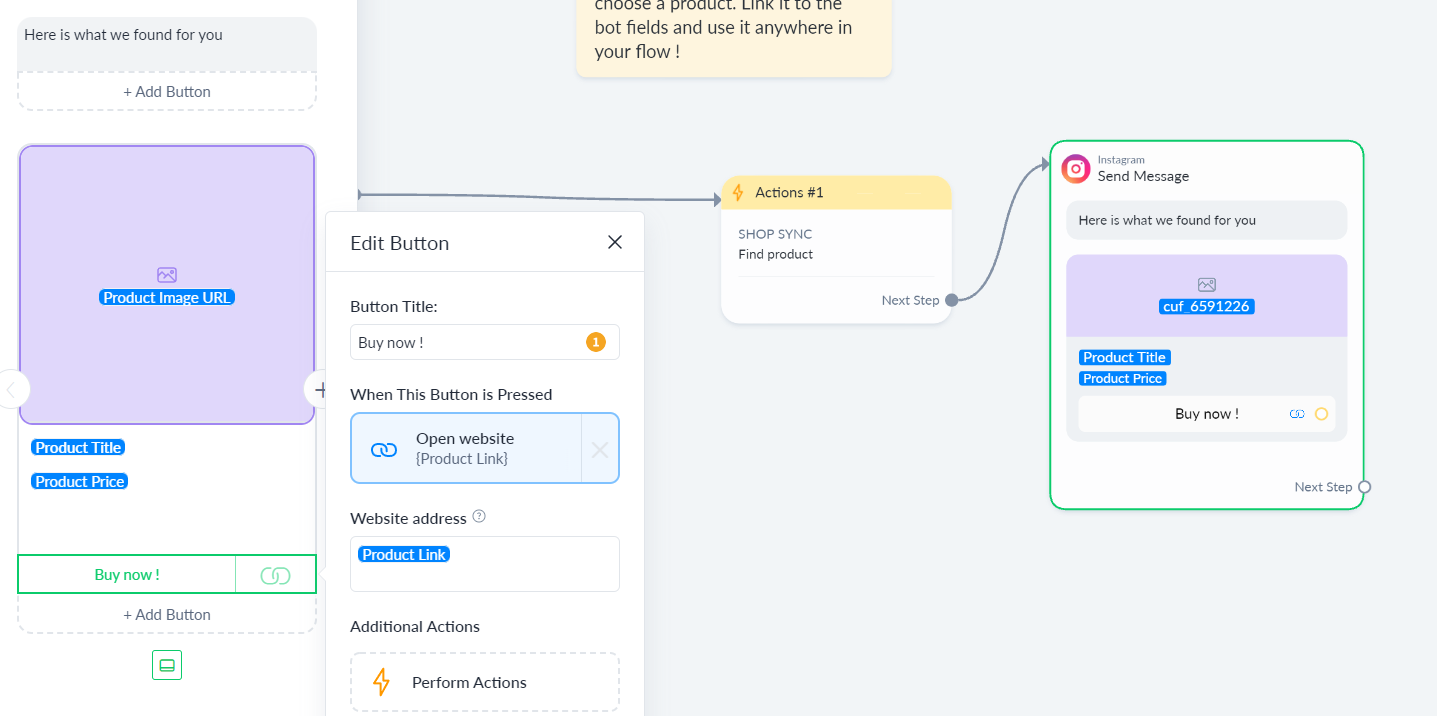
To add a single product to your flow.
- Go to Automation>Flows.
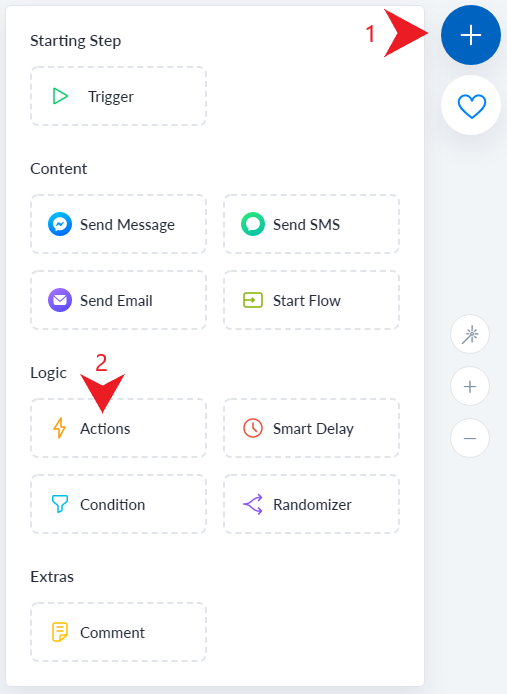
- Add an action to your flow like in the picture below.
- Select Click to add an action then +Action and select the SHOP SYNC option from the dropdown list.
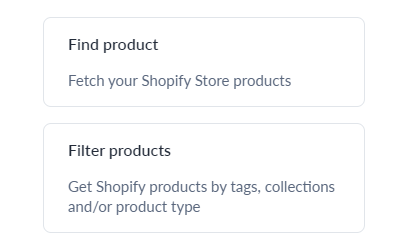
- Click Select action and choose “Find product”
- Wait for your products to load and select the product you wish to integrate to your flow.
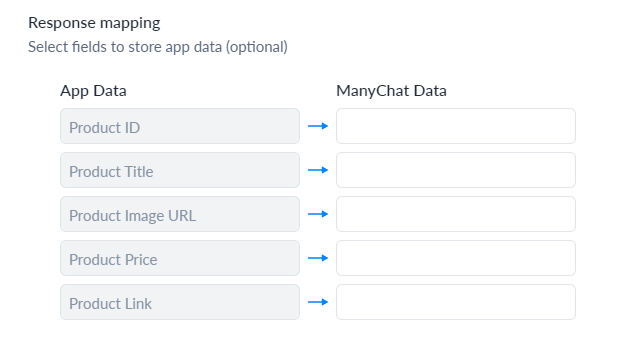
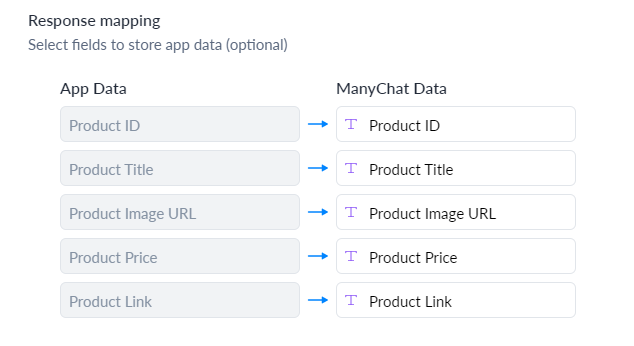
- Once you have made your selection, map the previous user fields to the ones in the response mapping section.
- Click Save.
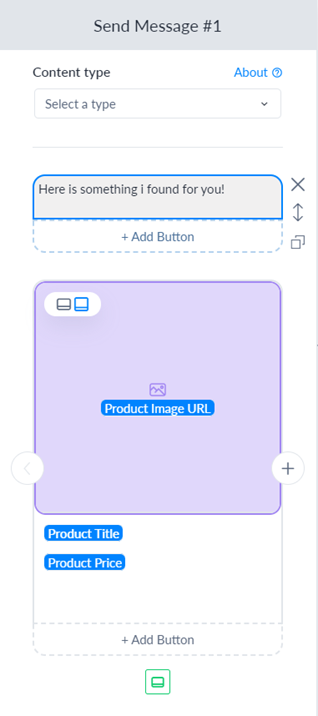
- Add a Send message action.
- In the send message configuration, select “+ Card”.
- Fill the card with the response mapped variables using the add variable button:
- Publish your Flow and look at your Shopify products appear in your ManyChat Flow.
Note : You can reuse the mapped variables for other purposes. They will still have the same data until you map it again with other data with the action.
Multiple Products
To add multiple products to your flow.
- Go to Automation>Flows.
- Add an action to your flow like in the picture below.
- Select Click to add an action then +Action and select the SHOP SYNC option from the dropdown list.
- Click Select action and choose “Filter products”
- Select a collection from the dropdown menu.
Note : You might have to wait for all the data to load. - All the other fields are optional for you to add filtering parameters. You need to enter that data manually for the tags. Make sure you don’t make any typos otherwise nothing will be returned.
- Map the Dynamic block query variable to “Dynamic Url”.
*This is very important. - Click Save.
- Add a Facebook Message and select “+Dynamic”
- Click on Add a request for dynamic content.
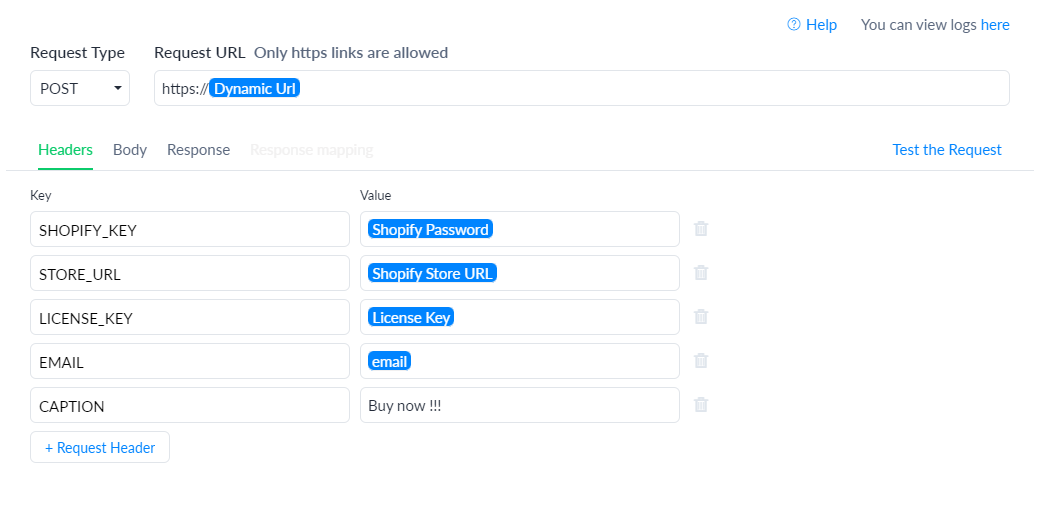
- Set the Request Type to POST
- In the request URL box write: https:// and add the Dynamic Url variable using the add variable button :
- In the Headers Section, add the following keys:
- SHOPIFY_KEY
- STORE_URL
- LICENSE_KEY
- EMAIL - The key CAPTION is optional. By default the text is "Buy now"
- Map the user fields to the appropriate key as shown below :
- Click Save.
- Publish your flow and watch it in action.
Latest Update
Instagram
All actions of ShopSync are now compatible with Instagram chatbot !
Find Product
- Fill the action input and output the same way as usual.
- Link the action with an Instagram send message action.
Filter Products
- Fill the action input and output the same way as usual.
- Add an Instagram message with dynamic content.
- Add the header INSTAGRAM and the value True.


28787800%20(1).png)